Guide
How to Choose a Photo That Will Stitch Clearly
The short answer
The photos that stitch most clearly have one main subject, strong contrast between subject and background, soft even light, and large simple shapes. Avoid busy backgrounds, tiny distant subjects, heavy shadows and fine textures. Crop tightly, because every stitch spent on background is detail lost from the subject.
Two photos of the same dog can produce completely different cross stitch patterns. One turns into a crisp, charming portrait; the other into a speckled brown blur. The difference is almost never the software. It is the photo. A minute spent choosing and preparing the right picture saves far more time than any amount of tweaking afterwards.
Why some photos convert badly
A cross stitch chart is a very low-resolution image. A 100-stitch-wide pattern has the same horizontal detail as a 100-pixel-wide thumbnail, about the size of an icon on your phone. Whatever is not visible at that size will not be in your chart. Colour is limited too: maybe 15 threads instead of millions of shades.
So the question to ask is not “is this a nice photo?” but “will this still read as a tiny, posterised thumbnail?”
The five qualities of a stitchable photo
1. One clear subject
Photos with one person, pet or object filling most of the frame convert best. Group photos and wide scenes spread your limited stitches over many small things, so each one ends up a few stitches across.
2. Contrast between subject and background
A black cat on a white sofa is easy. A tabby cat on a brown rug fights for the same few brown threads, and edges disappear. Look for photos where the subject is clearly lighter, darker or a different hue than what’s behind it.
3. Soft, even light
Harsh midday sun or flash creates deep shadows and blown-out highlights. In a chart, a shadow becomes a solid dark patch that can swallow an eye or half a face. Overcast daylight or light from a window gives smoother tones that colour reduction handles gracefully.
4. Simple background
Busy backgrounds (leaves, patterned wallpaper, crowds) become confetti: scattered single stitches of many colours. A plain wall, sky, or a background blurred by portrait mode is ideal, and it’s easy to remove entirely by setting its colour to No stitch in the converter.
5. Large shapes over fine texture
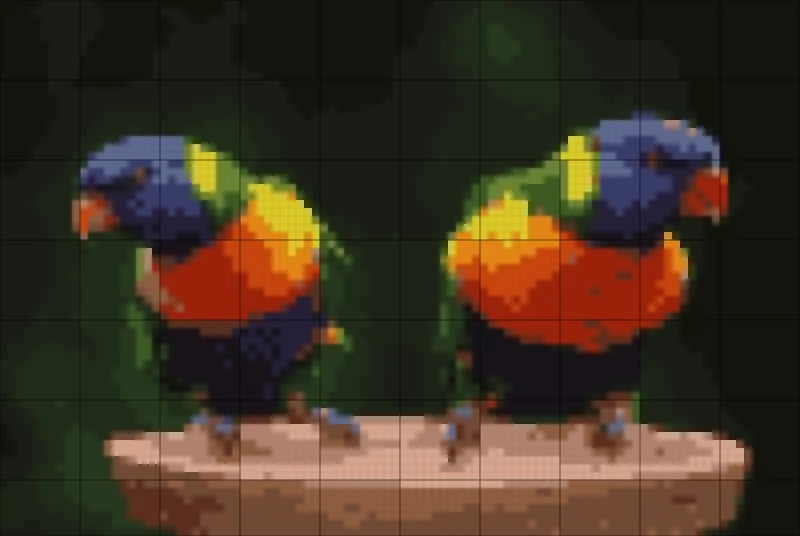
Fur, hair, grass, lace and knitwear have detail at a scale far below one stitch. The converter averages it into noise. Photos where the subject has large areas of fairly even colour (a red tulip, a ceramic cup, a bird with bold plumage) come through with character intact.
The squint test
Before converting, shrink the photo on screen until it’s about 3 cm wide, or simply squint at it. If you can still tell what it is, and the most important feature (eyes, a silhouette, a logo-like shape) is visible, the photo will make a good chart. If it turns into mush, either crop closer or pick another photo.
Preparing the photo
You don’t need photo-editing software, but a few minutes helps:
- Crop tightly in the converter’s Crop & rotate step. Square or 4:5 frames suit most portraits.
- Raise contrast slightly in Advanced mode if the subject blends into the background. Small adjustments (+10 to +20) are enough.
- Lighten a dark photo with brightness rather than adding colours; dark images otherwise use many near-black shades that look identical in thread.
- Remove the background after conversion by setting its colour(s) to No stitch.
The original photo is never changed and is not saved; the adjustments only affect the conversion.
Matching the photo to the size
| Photo type | Minimum width for a recognizable result |
|---|---|
| Single flower, cup, simple object | about 50–60 stitches |
| Pet portrait (head and shoulders) | about 80–100 stitches |
| Human face | about 100–120 stitches |
| Full body or scene | 150+ stitches |
These are starting points, not rules. Large, high-contrast features survive at smaller sizes than subtle ones.
Rights and permissions
Converting your own photos for your own stitching is straightforward. Photos taken by someone else, product photos, cartoon characters and logos usually belong to their creators. You can often stitch them for personal use, but you should not share or sell the chart or finished piece without permission. Our terms explain how rights work for patterns you make here.
Common mistakes
- Choosing a photo for its memory, not its clarity. If a precious photo is blurry or tiny, consider a simpler alternative: a name pattern with the date can carry the same meaning.
- Not cropping. The most common cause of a disappointing result.
- Fixing everything with more colours. More colours rarely rescue a low-contrast photo; they add speckle.
- Expecting skin tones to match exactly. Screens and threads differ, so check floss in daylight (why).
Next step
Once you have a good candidate, follow the complete walkthrough in how to turn a photo into a cross stitch pattern, or go straight to the converter and try one of the sample photos to see how each setting behaves.
Comparing two candidate photos
Suppose you have two photos of the same cat and want to know which will stitch better. Score each one quickly:
| Question | Photo A (sofa, lamp light) | Photo B (window light, plain wall) |
|---|---|---|
| One clear subject? | Cat plus cushions and a blanket | Cat only |
| Contrast with background? | Brown cat on brown sofa | Ginger cat on pale wall |
| Light? | Warm lamp, deep shadow on one side | Soft and even |
| Background? | Patterned throw | Plain |
| Squint test? | Cat shape blends in | Cat silhouette obvious |
Photo B wins on every line, even if Photo A is the more sentimental picture. Converted at 100 stitches wide with 14 colours, Photo A typically produces large brown patches where cat and sofa merge, and confetti from the patterned throw; Photo B gives a clean outline and a background you can remove in one click.
Fixing a “nearly right” photo
You don’t always have a perfect photo. These adjustments rescue many:
- Too dark: raise brightness by 10–20 in Advanced mode before raising colours. Dark photos waste colours on near-blacks you cannot tell apart in thread.
- Washed out: add 10–15 contrast so edges separate.
- Subject too small: crop until the subject fills at least two-thirds of the frame, then increase the stitch width rather than keeping the original framing.
- Busy background: crop it out where you can; otherwise convert, then mark the background colours as no stitch and erase leftovers with the fill tool.
Checklist before you convert
- The subject is recognisable at thumbnail size.
- The most important feature (eyes, a silhouette, a logo-like shape) has clear contrast.
- The light comes mostly from one soft direction.
- You have the right to use the photo for what you plan to do with the finished piece.
- You know the finished size you want, so you can choose the stitch width deliberately.
Questions stitchers ask
Are phone photos good enough?
Yes. Even a 12-megapixel phone photo has far more detail than a 150-stitch chart can use. Light, contrast and framing matter much more than camera quality.
Should I edit the photo before converting?
Light edits help: crop tightly, brighten dark photos and add a little contrast. The converter has brightness and contrast controls in Advanced mode, so you rarely need another app.
Do black-and-white photos work?
Very well. With 6–10 greys the chart is easy to stitch and the result often looks striking. Make sure the photo has a full range from dark to light.
Can I combine two photos into one pattern?
Convert each one separately, open both in the Studio, then copy a selection from one project and paste it into the other. Keep both at the same stitch scale so they match.
Try it now
Everything in this guide works in the free cross stitch pattern maker, right in your browser, with no account.
Try your photo in the converter →A pattern to practise with
Warm Cup
A terracotta cup on a saucer with steam, 16×14.